 Save
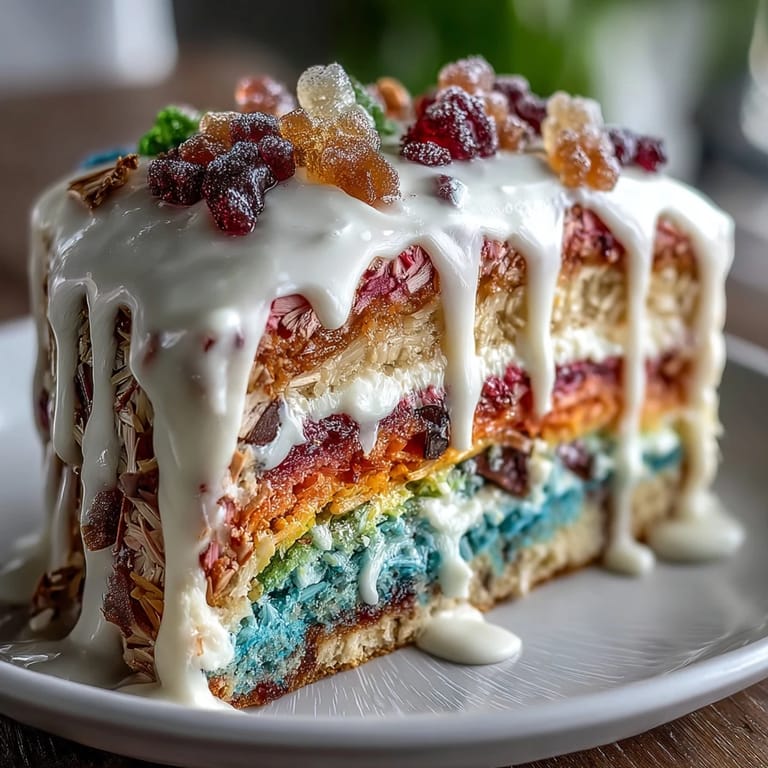
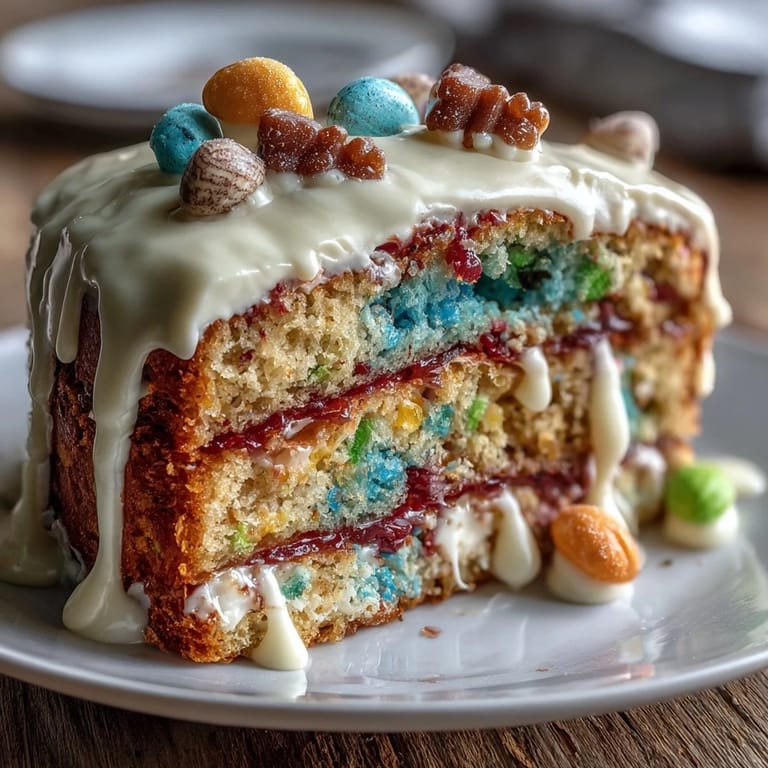
Save My neighbor knocked on the door one April afternoon with her daughter bouncing on her toes, asking if I could help her make something special for Cinco de Mayo. That's when I discovered this rainbow layer cake with candy hiding inside—a dessert that's part baking project, part treasure hunt. The moment we cracked open those gel food coloring bottles and started tinting the batter, her daughter's eyes went wide. I realized then that this cake wasn't just about layers and frosting; it was about creating that gasp-worthy moment when someone cut into it and discovered the piñata surprise. It's become my go-to for celebrations ever since.
I'll never forget bringing this to a potluck where everyone was skeptical about homemade desserts. As I cut the first slice and that avalanche of mini M&Ms and gummy bears tumbled out onto the plate, the whole table went quiet for exactly one second. Then someone shouted, "It's a piñata!" and suddenly everyone wanted to know how I'd done it, when really it's just a clever stacking trick combined with patience and good timing.
Ingredients
- All-purpose flour (3 cups): The foundation that holds everything together; make sure it's fresh because old flour can make your cake dense instead of tender.
- Baking powder and baking soda (2½ tsp and ½ tsp): These need to be measured precisely because they're what gives you that light crumb structure where the layers stay distinct.
- Unsalted butter and granulated sugar (1 cup and 2 cups): Creaming these together for a full three minutes aerates the batter and creates that delicate cake texture.
- Room temperature eggs and milk: Cold ingredients don't blend smoothly, which can cause lumps or uneven rising.
- Vanilla extract (2 tsp): Use real vanilla; the imitation stuff can taste metallic when paired with bright gel colors.
- Gel food coloring (red, orange, yellow, green, blue, purple): Gel colors won't thin your batter like liquid food coloring does, and they give you those vibrant, true rainbow hues.
- Assorted small candies (1½ cups): This is your treasure; stick with items that won't soften or melt like chocolate (save that for another time).
- Butter and powdered sugar for frosting (1½ cups and 5 cups): Sift that powdered sugar because even tiny lumps will show up as grittiness in your frosting.
Tired of Takeout? 🥡
Get 10 meals you can make faster than delivery arrives. Seriously.
One email. No spam. Unsubscribe anytime.
Instructions
- Set up your station:
- Preheat the oven to 350°F and have three 8-inch round pans greased and lined with parchment paper. If you have six pans, wonderful; if not, you'll bake in batches, which just means extra cooling time between rounds.
- Mix the dry foundation:
- Whisk together flour, baking powder, baking soda, and salt in a medium bowl and set it aside. This step prevents lumps and distributes the leavening agents evenly.
- Cream butter and sugar:
- In a large bowl, beat softened butter and sugar together for about three minutes until the mixture is pale, fluffy, and looks almost mousse-like. This is where the magic of aeration happens, creating that tender crumb.
- Incorporate eggs and vanilla:
- Add eggs one at a time, beating well after each addition to ensure they're fully incorporated. Finish with vanilla extract and beat just until combined.
- Build the batter:
- Add the dry mixture in three parts, alternating with the milk and always starting and ending with dry ingredients. Mix on low speed just until you don't see flour streaks; overmixing develops gluten and makes the cake tough.
- Create your rainbow:
- Divide the batter equally among six bowls and add a different gel color to each, stirring gently until the color is uniform. The batter should look like a painter's palette when you're done.
- Fill the pans:
- Pour each colored batter into its prepared pan, smooth the tops, and slide into the oven. Bake for 15 to 18 minutes until a toothpick inserted in the center comes out clean with just a few moist crumbs.
- Cool with patience:
- Let each layer rest in its pan for about 10 minutes (this prevents breakage), then transfer to a wire rack to cool completely. Don't rush this step; a warm cake crumbles when you try to carve it.
- Create the cavity:
- Once completely cool, use a 3-inch round cutter to carefully carve out the center of four of your six layers (keep the top and bottom layers whole and intact). Push straight down, twist slightly, and lift out the cylinder of cake.
- Prepare the frosting:
- Beat softened butter until creamy, then gradually add sifted powdered sugar, milk, vanilla, and a pinch of salt. Beat until you reach a smooth, spreadable texture that's fluffy but not grainy.
- Stack with strategy:
- Place your purple layer (the bottom) on a serving plate and spread a thin layer of frosting on top. Stack the first cut-out layer on top, frost lightly, and repeat with remaining cut-out layers, building a tower of color.
- Fill the surprise:
- Pour your assorted candies into the center cavity created by all those stacked cut-out layers. Don't overfill or they'll spill when you add the top layer.
- Seal the secret:
- Place the final whole layer (your top layer) over the candy-filled cavity, pressing down gently to secure it. This is the moment when you're protecting the surprise.
- Frost the exterior:
- Generously frost the outside and top of the entire cake with remaining frosting, smoothing or creating texture as desired. You can add colored frosting stripes, sprinkles, or decorations for that festive piñata feel.
- Chill before the reveal:
- Refrigerate the finished cake for 30 minutes so the frosting sets and the layers are easier to slice cleanly. When you cut into it, that candy tumble will be spectacular.
 Save
Save There's something magical about watching someone's face shift from skepticism to wonder when they discover that the cake they're eating is actually a piñata. I've seen adults forget their manners, kids laugh with their mouths full of frosting, and everyone ask the same question: "How did you do that?" That's when I know a dessert has crossed from simple cake into something memorable.
The Coloring Strategy That Actually Works
The first time I made this, I used liquid food coloring because it was what I had in the pantry, and the batter looked watery and separated. The layers baked unevenly and some were oddly cakey while others were dense. I learned the hard way that gel coloring is worth the trip to a specialty store or online order because it's concentrated, doesn't thin your batter, and gives you those true, vibrant rainbow shades that make the reveal so stunning. Your guests will notice the difference in color intensity, and your cake will bake more consistently.
Troubleshooting Stacking and Structure
The scariest moment in making this cake is usually when you're stacking the layers, especially once you've carved out those center holes. I used to worry the whole thing would topple, but I discovered that a thin, even layer of frosting between each layer acts like glue and keeps everything stable. You don't need much; just enough to anchor the next layer. If your layers are slightly uneven from baking, a dab of frosting under the lower side of a wobbly layer corrects it instantly. Chill between layers if you're nervous, and remember that frosting is forgiving.
Candy Selection and Seasonal Variations
The assorted candies you choose completely change the personality of this cake, and part of the fun is picking your mix. I've used mini M&Ms and rainbow sprinkles for Cinco de Mayo, then switched to Halloween candies for a fall party. The only rule is to avoid anything that will soften, melt, or stick to itself—so chocolate pieces are out, but gummy bears, hard candies, and sprinkles are perfect. You can even theme the colors of your candies to match your frosting decorations for an extra-coordinated look.
- Stick with candies that stay firm and won't melt or clump together inside the cavity.
- Avoid anything sticky or chunky that might jam during slicing and ruin the presentation.
- Consider coordinating your candy colors to your frosting decorations for a polished, intentional look.
 Save
Save This cake has become my celebratory signature, the dessert I make when I want to turn an ordinary dinner into something people will talk about long after the last crumb is gone. There's joy in watching the surprise unfold, and that's worth every minute of planning and baking.
Recipe FAQs
- → How do I create the colorful layers?
Divide the batter evenly into six portions and tint each with a different gel food coloring before baking separately to achieve vibrant layers.
- → What candies work best for the center?
Small, assorted candies like mini M&Ms, sprinkles, or gummy bears are ideal to create an easy-to-slice, fun surprise without melting or sticking.
- → Can I make this cake gluten-free?
Yes, substitute the all-purpose flour with an equal amount of gluten-free flour blend, ensuring it’s suitable for baking layered cakes.
- → How do I assemble the layers with the candy filling?
Cut out a center circle from four of the six layers, stack them with frosting, pour candies into the cavity, and then top with a whole layer to seal the surprise.
- → What is the best way to decorate the cake?
Apply a smooth layer of frosting around the cake and use additional colored frosting or sprinkles to enhance the festive appearance.